

How to Make Your Own Tile Backgrounds

Disclaimer: Some of the links below are affiliate links which means that if you click through and purchase, Weekend Creative will earn a percentage of the purchase at no additional cost to you. Thank you for supporting us so we can continue creating educational content!
Today I want to talk about how I make tile backgrounds for our shoots. It might sound intimidating, but tiling is actually super simple and easy, especially since you don’t have to worry about it being waterproof or too durable in this case. This is a great way to add in a different texture or create a bathroom or kitchen scene, and the great thing is that these backgrounds will last a really long time, so even though you have to invest a little bit of time and money up front, it’s definitely worth it. When I was trying to learn how to tile, I couldn’t find a great tutorial on how to make something like this for photos, so I’m really excited to share this with you today.
The first time I made tiled backgrounds, I made four different ones, and only one of them was for a specific shoot. We’ve only used two of them (the plain white square tile and white penny tile), and so I would recommend sticking with very simple and basic tile unless you have a specific reason to use more of a pattern. I also made them in squares which I wouldn’t recommend. The edge is most likely not going to be super neat, so you will want to use boards that are large enough to fill the scene you’re shooting without having to show the edge unless you’re prepared for some heavy photoshop. You can purchase rectangle chipboard at most home improvement stores which I think works much better than the squares I used the first time.

You will need:
Chipboard or Wood (the lighter the better) in the size you want to tile
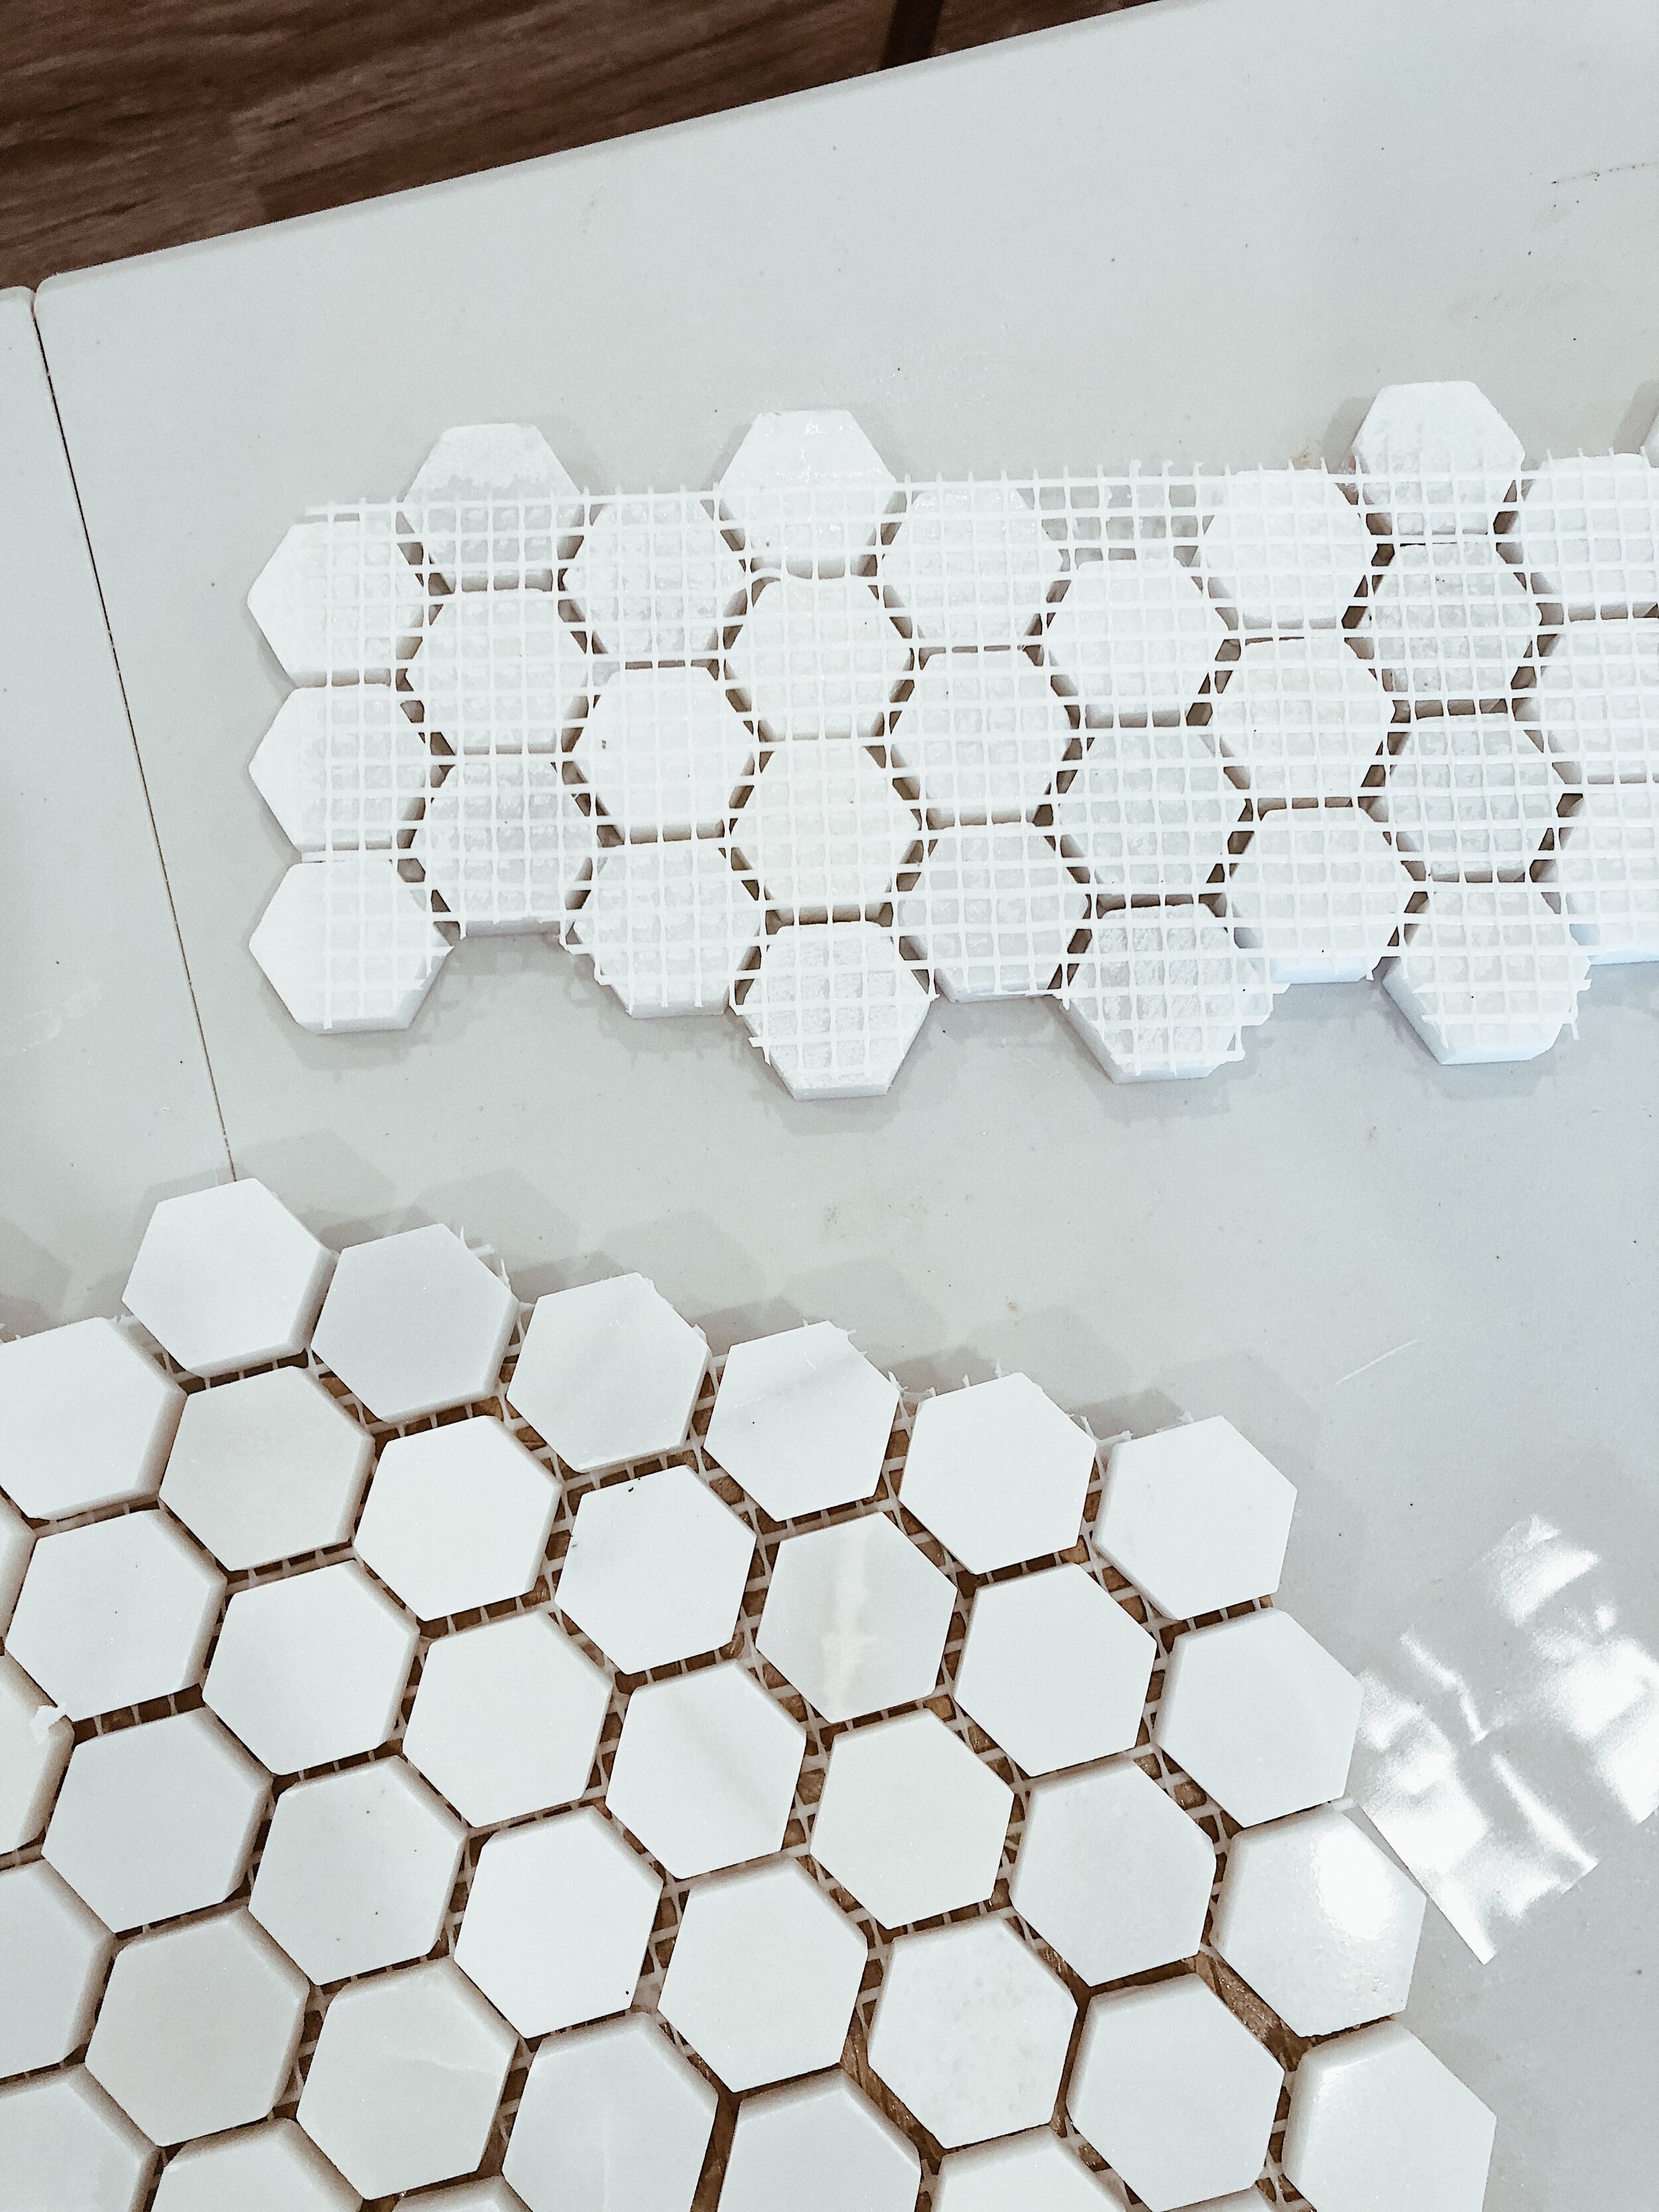
Tile (I like to buy the kind that comes in square sheets)
Simple Mat or other tile adhesive
Pre-Mixed Grout (you can also mix your own which is cheaper, but this is MUCH easier, make sure to check the color)
Spatula or spoon for the grout
Now that you have everything you need, let’s start tiling!
Peel off the back (white side) of your Simple Mat and place it on the surface you want to tile. Make sure to smooth out any bubbles, and don’t overlay pieces on top of each other or you’ll have bumps in your tile. Press firmly so it attaches to the surface. Do not remove the plastic covering.

Place your tile on top of the Simple Mat and figure out the best way to arrange it. Trim any pieces that fall off the edge by using a box cutter on the backing.
Peel off the plastic covering from the Simple Mat and place your tile. Do not press too hard until the tile is where you want it, once you press it’s very hard to move. Make sure to align the squares of tile the best you can, and leave the same amount of space between the squares as there is between the individual tiles. If needed, you can use a glue gun to secure any loose tiles.
Press on your tile. I would recommend placing the surface on the floor and stepping on it to be sure that the tile is really secure. If your tile is porous, dampen it with a wet cloth to prevent the grout from sinking in.
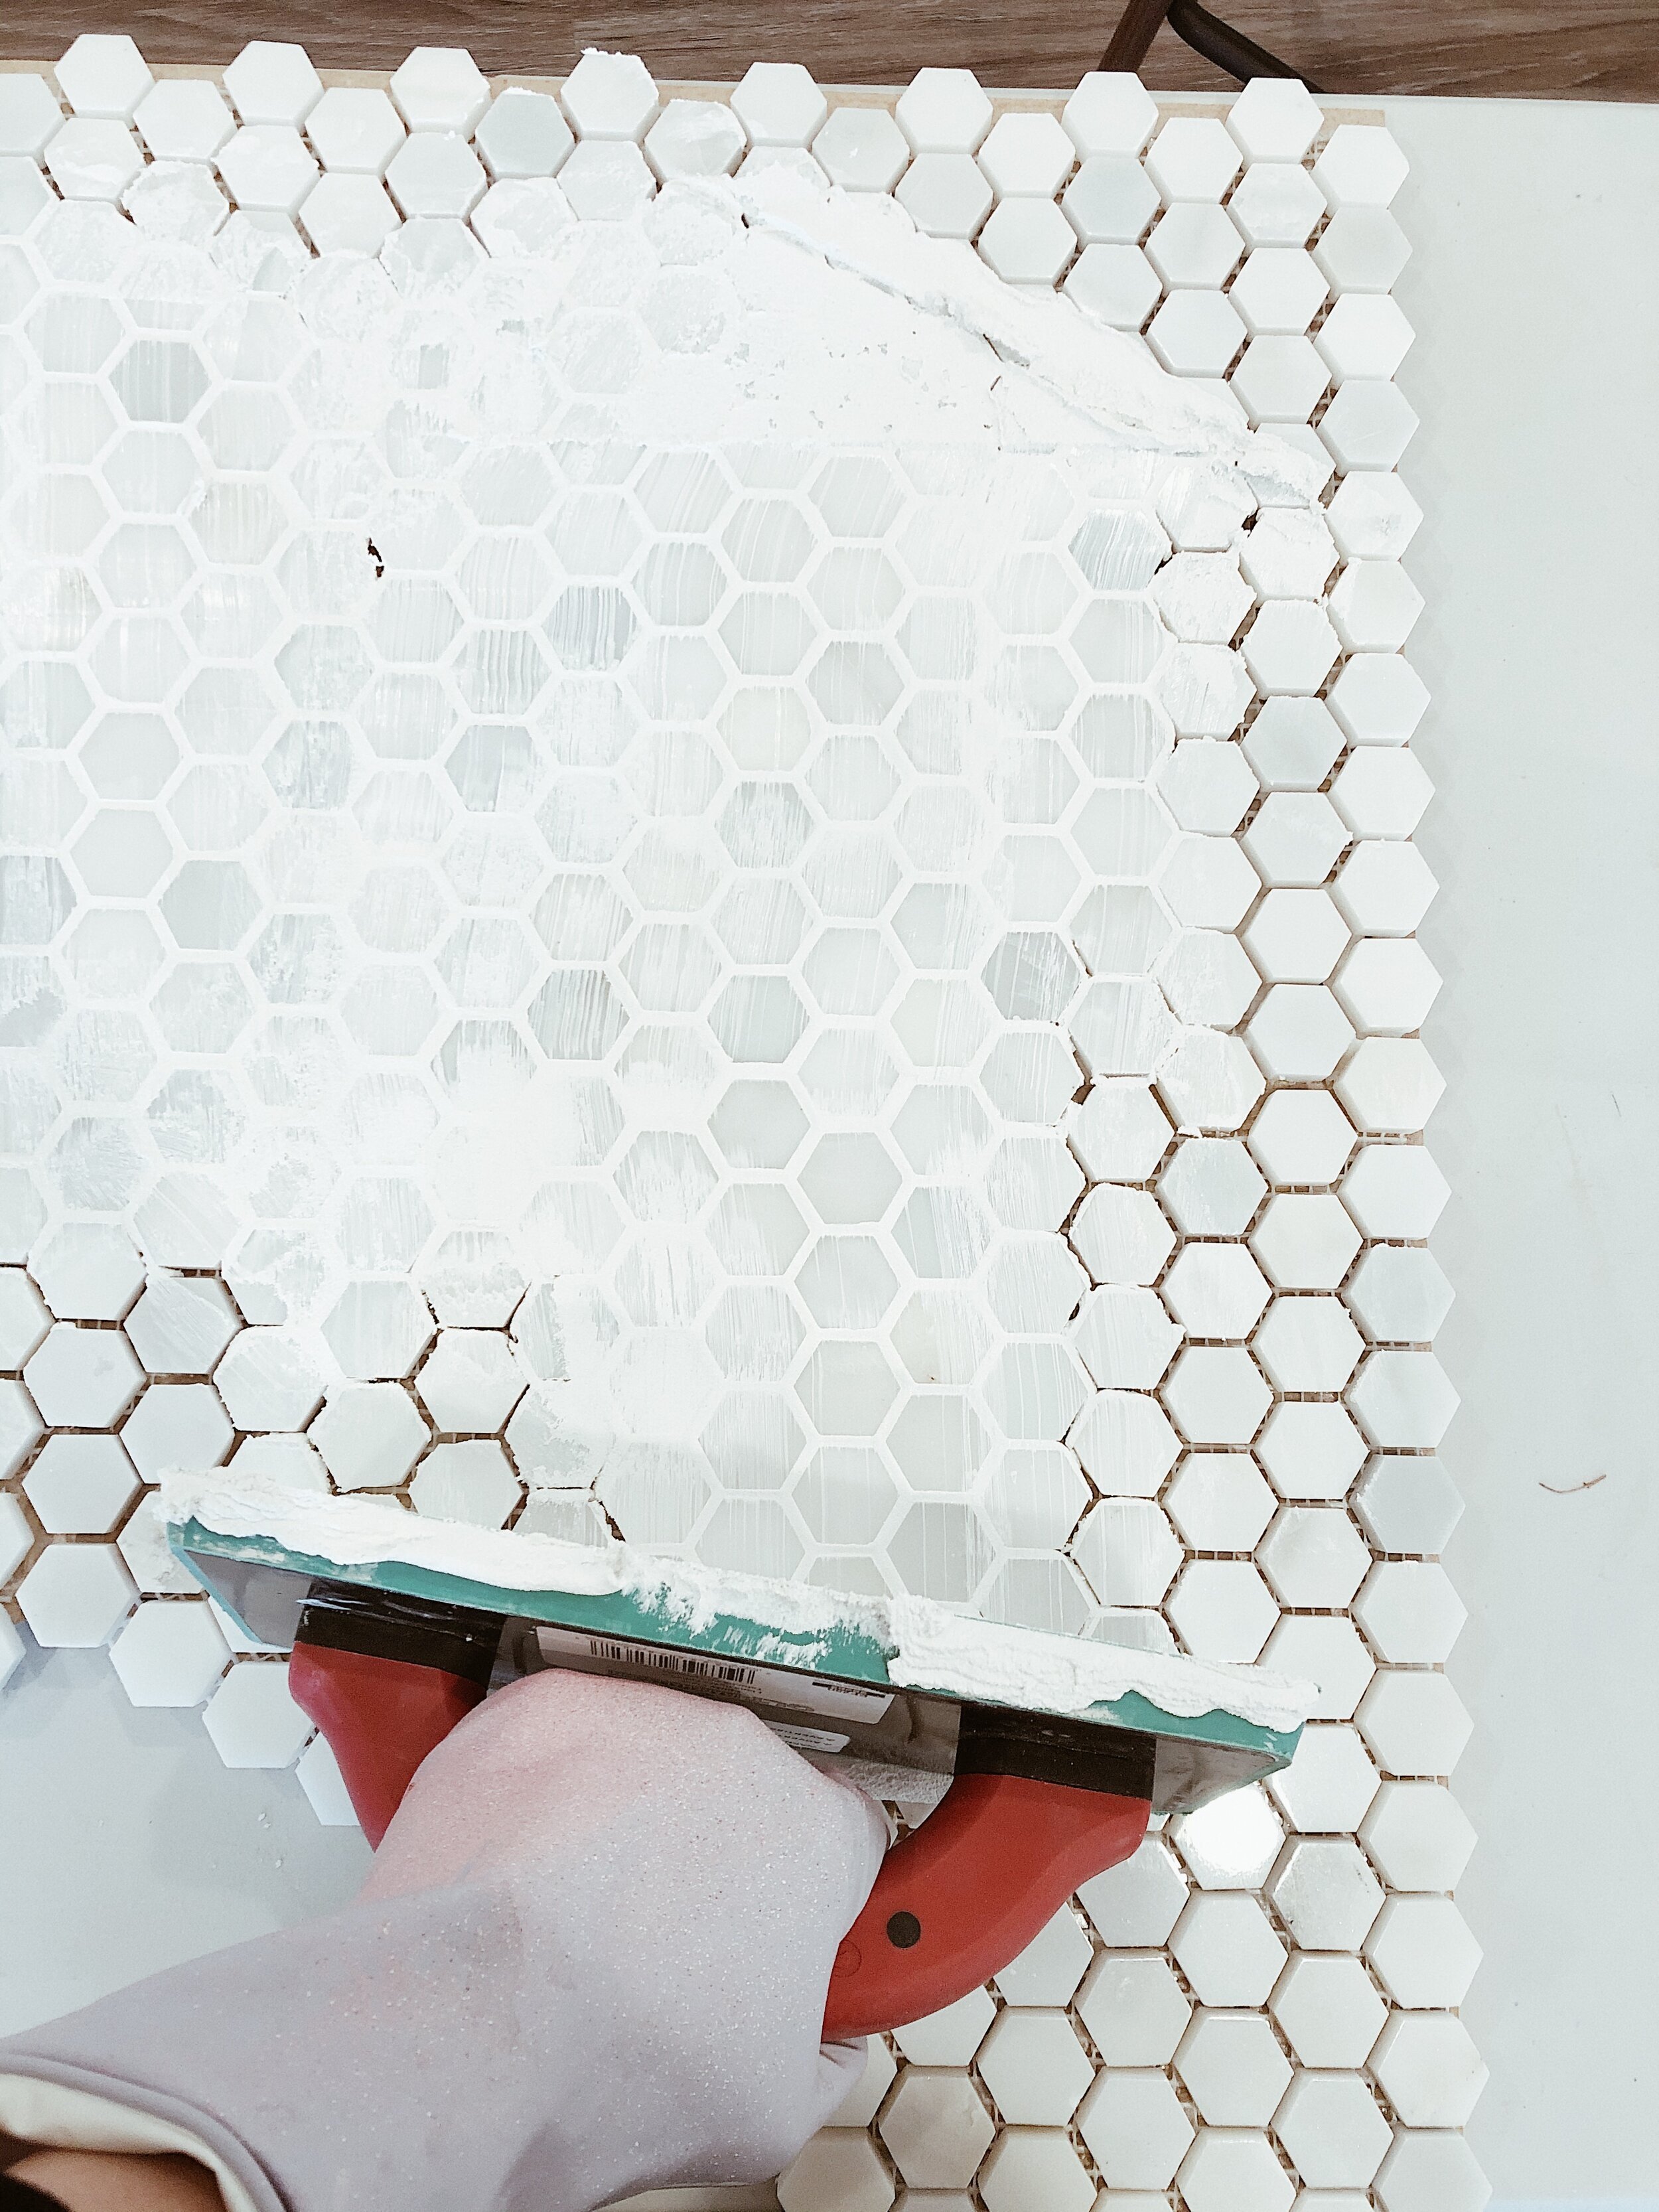
Using a spatula, spoon some grout onto the tile. Less is more so start with a little and add more as you go.

Use the epoxy float to press the grout into the grooves. Start by holding it flat and smoothing the grout, and then hold it at 90 degrees to further press it in and scrape off all the excess.
Continue smoothing and scraping until all of the grooves are filled in and all of the excess grout is scraped off.

Wet your sponge and lightly wipe the tile in a circular motion. You want to keep the sponge clean so rinse it often. Make sure to wipe gently to not mess up the grout, but firmly enough to remove as much excess as you can.
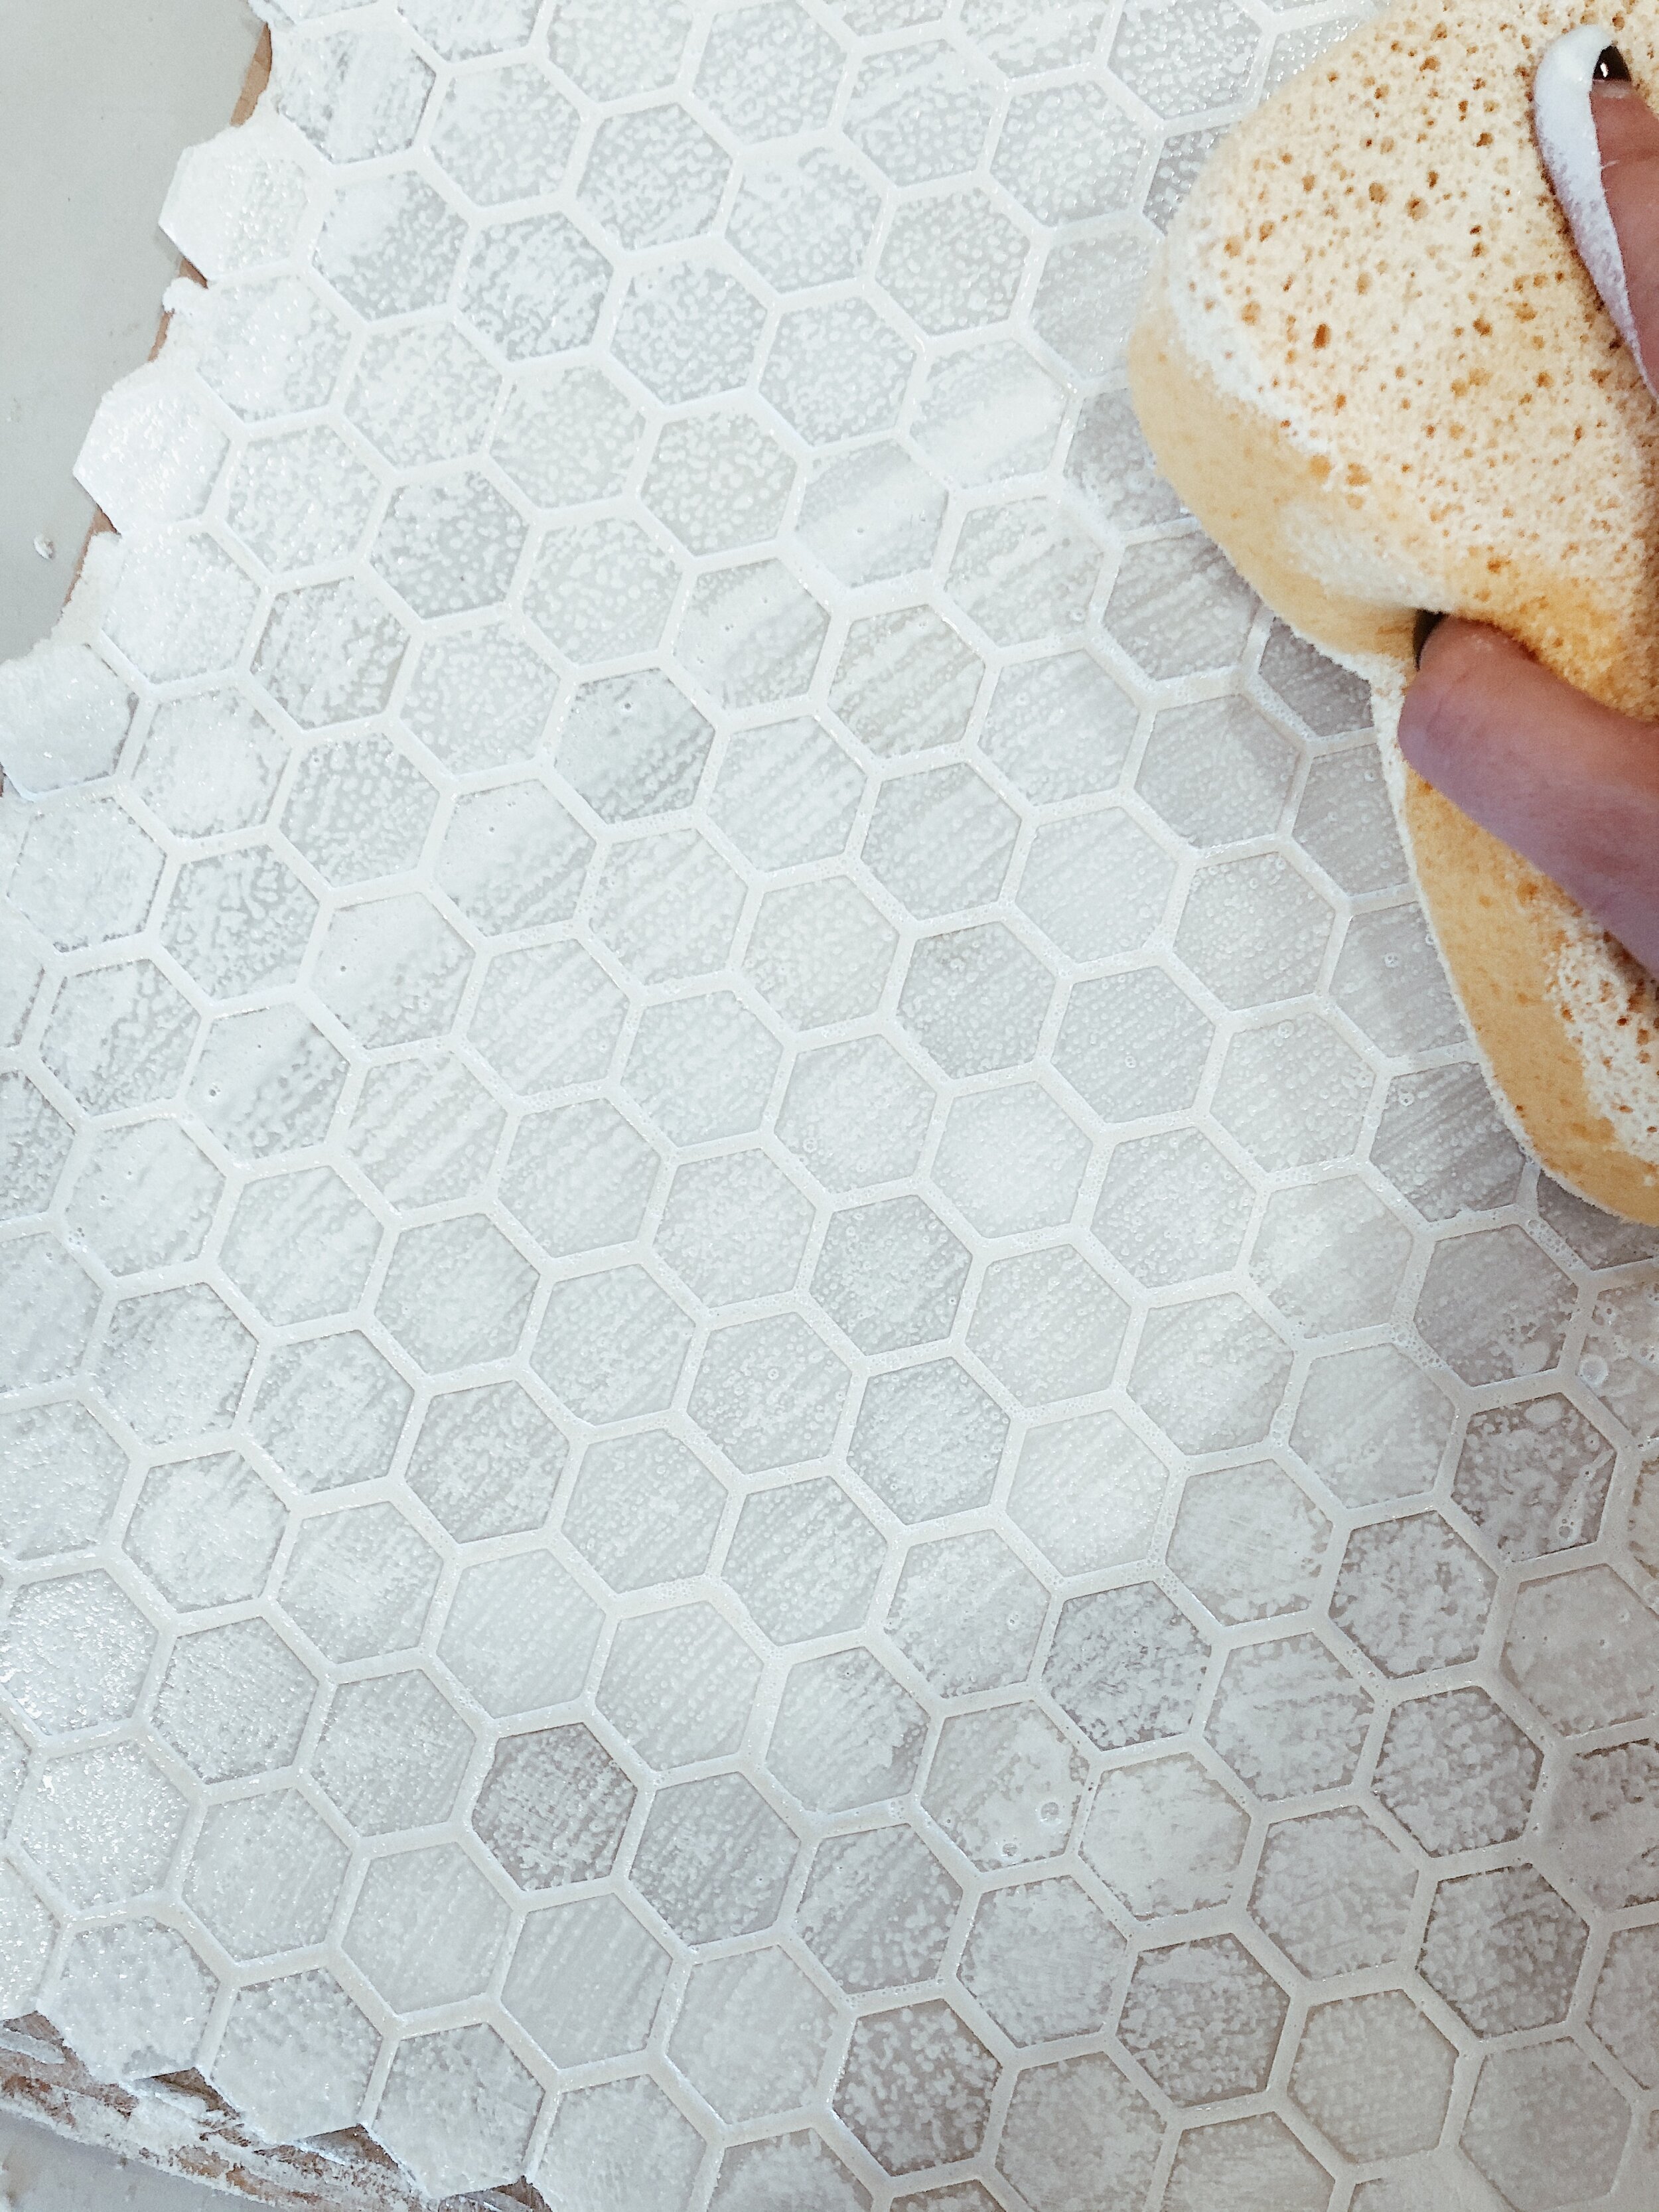
There will still be a “haze” on the tile when you’re done wiping with the sponge. Wait until the grout is fully dry (check the instructions on the package) and then gently wipe with a damp cloth to remove the rest of the grout residue.
Be warned that this is a messy process, so I recommend wearing old clothes and maybe even doing this outside if you can. I’m planning on also putting up an IGTV video on this soon, so make sure you’re following us on Instagram if you want to see how this all comes together in real life.
I hope that this inspires you to get creative and make some fun custom backgrounds for yourself! Make sure to tag us if you use this tutorial, I would LOVE to see what you make!
Is it the weekend yet?
Elle