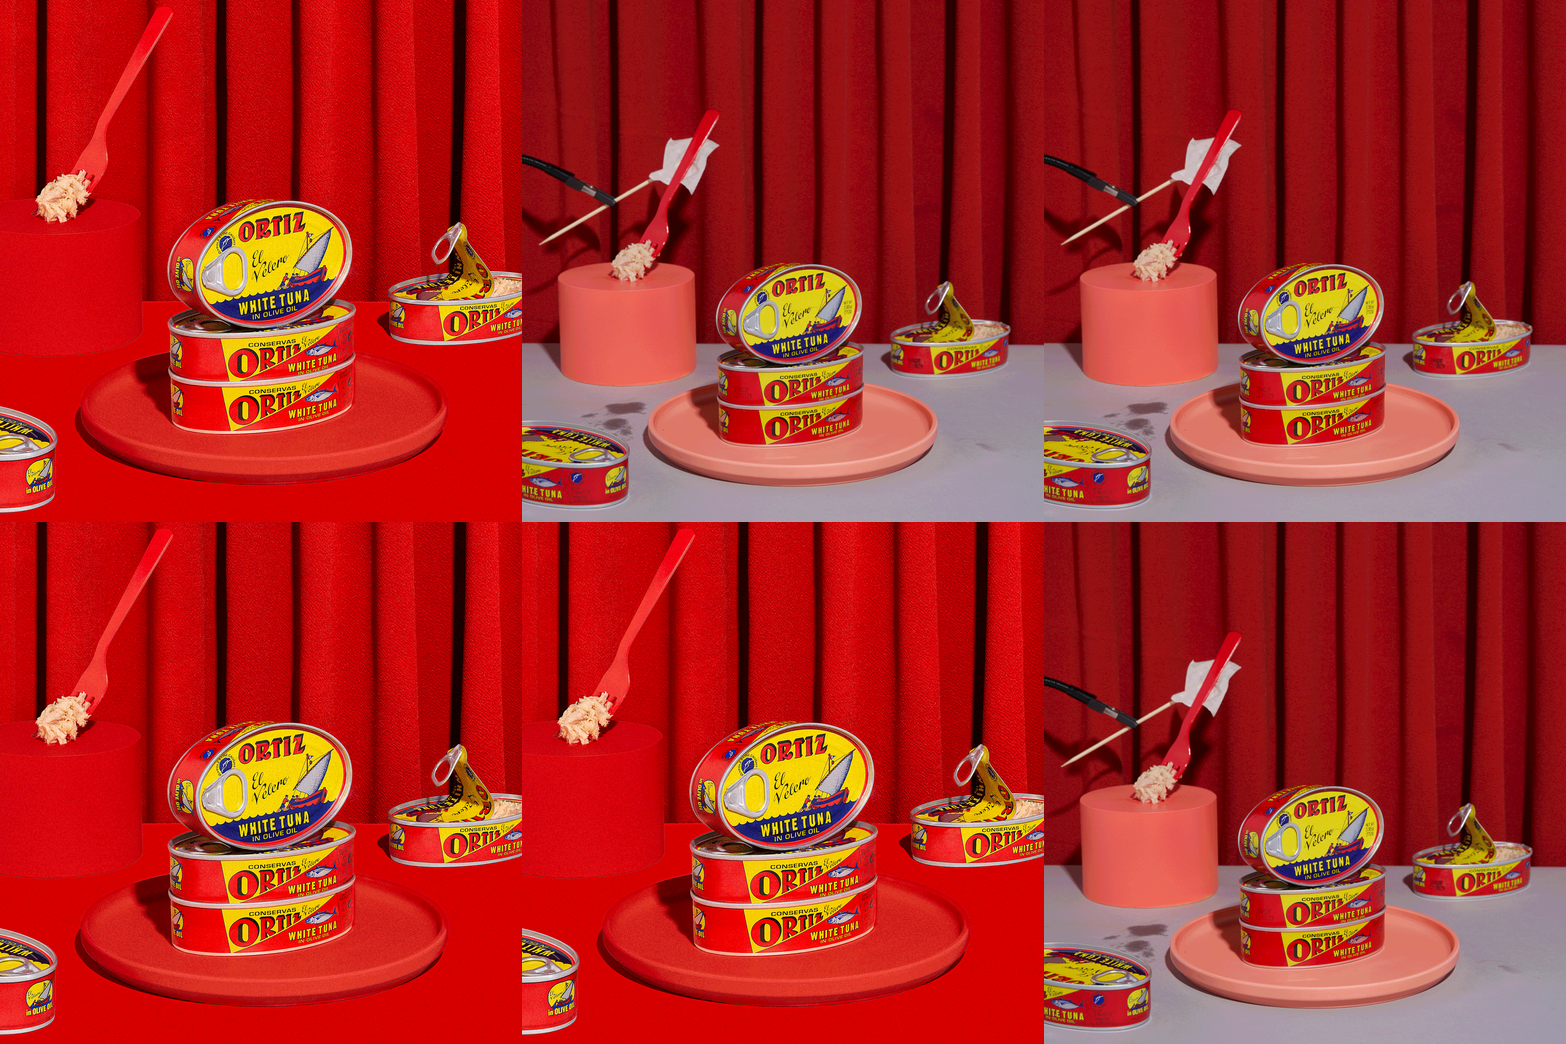
Retouching for Product Photography
There are 2 big pieces to commercial product photography…
1: You have to take the photo. Obviously.
2: You have to edit it — which isn’t quiiite as simple as it sounds. Between adjusting exposure and creating patterns to compositing and background clean up, there are a LOT of moving parts.
And you know us — we love showing you guys allll the things and all the moving parts.
Enter: our new course, Retouching for Product Photography! This is our most practical, foundational course yet (!!!), and it’s packed with an absolute ton of top-tier knowledge a la ½ of the Weekend Creative team, Arabela!
In our Retouching for Product Photography course, Arabela is pulling back the curtain on the exact tips and tricks we use when retouching commercial images for clients like Benefit Cosmetics, The Honey Pot Co, and Blue Bottle Coffee.
Starting with prepping images in Lightroom and then getting into the heavy lifting in Photoshop, Arabela’s showing everything from adjustment layers and blending modes to adding depth, extending backgrounds, and exporting for web.
Plus we’re including three bonus lessons on recently-released tools you won’t see in older retouching courses that are game changers for speeding up your process!
You ready?! Us, too! Here’s what you’ll learn:
-
✺
How to build an effective retouching workflow in Lightroom and Photoshop
-
✺
How to composite an entirely new image from scratch
-
✺
Several different approaches for removing unwanted objects
-
✺
How to focus stack in Photoshop to achieve a large depth of field
-
✺
The secrets to compositing a fun pattern shot by combining multiple images
-
✺
How to retouch backgrounds by adding color or removing wrinkles
-
✺
The art of adding, changing, or enhancing color using Color Fill Layers and Blending Modes
-
✺
Weekend Creative’s best tips for exporting your images
-
✺
How to add depth and interest to your product images
-
✺
The High Pass sharpening method for creating crisp images
Plus Three Bonus Lessons!
*Live Gradient Tool
*Generative Fill
*Remove Tool
One more thing -
To cap off the course you’ll complete a final project — AKA, your time to SHINE by editing some stills with the techniques Arabela taught you!
As usj, every piece of content we create over here is designed to be as impactful and informational as possible — and this one’s no different. We can’t wait for you to get your hands on it and learn how to edit just like Arabela!
In our Retouching for Product Photography course, Arabela is pulling back the curtain on the exact tips and tricks we use when retouching images for our clients. Starting with prepping images in Lightroom and then getting into the heavy lifting in Photoshop, Arabela’s showing everything from adjustment layers and blending modes, to adding depth, extending backgrounds, and exporting for the web.
✺ Units + Lessons ✺
-
1.1 Image Prep Intro
1.2 The Basics (File Formats + Color Management)
1.3 Organizing, Importing, and Culling in Lightroom
1.4 Basic Adjustments (WB, Lens Correction, and Transform) + Pasting Develop Settings
1.5 Lightroom to Photoshop + working non destructively (layer masking, smart objects)
-
2.1 Compositing Intro
2.2 Compositing to Extend a Background
2.3 Removing Unwanted Objects
2.4 Compositing Extra Products/Props
2.5 Compositing Products with Different Lighting
2.6 Focus Stacking
2.7 Compositing A New Image from Scratch
2.8 Compositing A Pattern
-
3.1 Transforming and Cropping Intro
3.2 Guides + Rulers
3.3 Camera Raw Filter > Geometry
3.4 Transform Tool (Skew + Warp)
3.5 Liquify Tool
3.6 Straighten + Crop Tool
-
4.1 Retouching Backgrounds Intro
4.2 Smoothing Backgrounds
4.3 Smoothing or Extending Background Edges
4.4 Retouching Fabric (Wrinkles, Fixing Curtain Folds, etc)
4.5 Removing Unwanted Objects with the Spot Healing, Clone, and Stamp Tool
4.6 Bonus Lesson: Live Gradient Tool
4.7 Bonus Lesson: Generative Fill
-
5.1 Retouching Products + Props Intro
5.2 Dust & Scratches
5.3 Removing Blemishes with the Spot Healing, Clone and Stamp Tool
5.4 Transform Products and Props
5.5 Bonus Lesson: Remove Tool
-
6.1 Adjustments & Blending Modes Intro
6.2 Using Levels and Layer Masks to Adjust Exposure
6.3 Adjusting Prop Colors
6.4 Adjusting Backdrop Colors
6.5 Applying Color to a Gray Background
-
7.1 Dodge & Burn and Sharpening Intro
7.2 Add Depth using Dodge & Burn
7.3 High Pass Sharpening
-
8.1 Exporting Intro
8.2 Exporting from Photoshop
8.3 Exporting from Lightroom
-
9.1 The Final Project


