

Shoot Process and Organization Part 3: Planning and Executing a Shoot
Disclaimer: Some of the links below are affiliate links which means that if you click through and purchase, Weekend Creative will earn a percentage of the purchase at no additional cost to you. Thank you for supporting us so we can continue creating educational content!
This is the third post in a series about our shoot process and how we stay organized when we’re working with multiple clients at once. You can read the first post all about our favorite organizational tools here, and about productivity here. In this post I’m going to walk you through how we actually plan and execute shoots, and I’ll also tell you all about a tool that we developed to help you in this process - our customizable shoot plan download. This post was a little difficult to write, mostly because each shoot is so different that listing out a standard process can be challenging. Keep in mind that this is a generalized list of steps and hopefully it will be a helpful starting point for you that you can customize for your own shoots. Let’s dive in!
look through all client notes and requests
Before you start planning, make sure to review all your notes from your calls with the client, emails, and any shot list they’ve sent over. Remember that notebook we talked about in this post? This is where it comes in handy. I always find that this step is helpful, especially when working with multiple clients at once. It’s so easy to get things mixed up, or just forget details. This will also often bring up details that you may have missed or additional questions that you need to ask the client.

brainstorm
Brainstorming will be a little different if you have a specific list from the client vs starting completely from scratch. I find that it’s helpful to have specific goals for the images before coming up with concepts, so if the client doesn’t have a specific list, you could start by creating a list of potential goals for yourself. For example, showcase the ingredients of the product, educate customers on the benefit of the product, and advertise the summer sale could be some goals.
Start by thinking about the product and it’s qualities as well as the branding of the company. For example, if it’s a beverage company, you can list out ingredients, places, or occasions that one might drink the beverage, and adjectives describing their branding. I find that it’s helpful to do this in the form of a brain map. Write those words down and then create branches off of those those words with other related words, and just write down as much as you can. These words will help you come up with concepts that make sense with the specific product and brand and can also serve as search terms when looking for inspiration.
Once you have a good brain map, look over everything and see if any ideas or potential concepts jump out to you. Make a list of as many shot ideas as you can and then see if there are ways to group them into sets or concept groupings.
One of the best ways to work efficiently when shooting larger image amounts is to create groups of images that will be shot in the same set or in similar sets. Not only will this save you time, but it will make your shoot more cohesive. This doesn't mean that the images will look exactly the same, by changing the product, camera angle, props, or arrangement, you can create a completely different image in the same set multiple times.

make a mood board
After you’ve come up with your list of ideas and decided if you will be grouping them by set or by image, it’s time to look for inspiration. We recommend holding off on this step until after thoroughly brainstorming and coming up with as many concepts as you can on your own. It’s tempting to immediately jump over to Pinterest and look for ideas, but once you see someone else’s work it becomes much more challenging to come up with original ideas or not copy - even unintentionally. Remember that the point of looking for inspiration and creating a mood board is to help you visually communicate your concepts to your client as well as keep you on track the day of the shoot. Your work will be much stronger if you keep your mood board as inspiration only, and keep your concepts original. You can read more about mood boards in this post here.
When you are going through images to make your mood board, save them in a folder on your computer, this will help you when you make a shoot plan which leads us to…

create a shoot plan
…our very first download! We’ve created some templates for ourselves that save us a lot of time in our process. These templates are a base for us so we aren’t starting from scratch every time we go to plan a shoot or send a proposal, etc. We think that these templates are something that other photographers could benefit from as well, so we’re making them available for purchase! You can get all of the details here, but I’ll give you a quick rundown of what the shoot plan is and what comes with your purchase.
It can be a challenge to communicate to your clients exactly what you’re envisioning when presenting concepts for approval, or showing how you will execute their campaign. We found that neither verbal or visual was quite enough, so we created a template where we can easily do both. This plan creates a foundation that drives the entire shoot so that once your concepts are approved, you can move easily and quickly into production. It helps you to think through key shoot details and organize your shoot into groups of images or single shots. We typically send this to a client once the shoot is booked, but you could also use it to pitch ideas to potential clients if you want.
This template is fully customizable so you can add all of your own branding, fonts, and colors. Along with an Adobe Illustrator file, it comes with written instructions with more details about building a shoot plan including brainstorming questions to help you develop concepts, a video tutorial walking you through how to use Illustrator to make it your own, as well as two shoot plan examples showing different ways to utilize the plan.

create a list of to-dos
Once you have your shot list all planned out in detail, you can use that to create your to-do list for the shoot. We like to use Asana for this because it keeps all our tasks in one place. Go through your shot list and write down every single production task that needs to be accomplished - set items and props that need to be purchased, painted, or made, every single item you need to accomplish those tasks and when they need to be done. The day of the shoot, set up a big table and organize all your set and prop items by image or image group. These steps will help you stay organized (especially when working on multiple shoots at once) and make sure that no details are missing.
It’s also helpful to go through your shot list and rearrange the shooting order based off what makes the most sense. For example, you probably want to shoot all the images within the same set together, but if you are shooting each image in a different set, you might want to look at the camera angle and shoot all images with the same angle together. Think about other aspects such as food that might not look as fresh as the day goes on, lighting, etc when deciding the best shooting order.
execute
While I can’t give you a lot of specifics on how to execute your concepts without knowing what they are, here are some frequently asked questions about some of our shoots, as well as some past blog posts that can help you with executing your own.
Three of Our Favorite Photography Tools - This post talks about three of our favorite tools that we use almost every shoot: putty, fishing line, and helping hands.
Where to Find Shoot Props - Here is a list of some of our favorite places to find shoot props. We also recently added some of our favorite props including wooden shapes, prisms, and dried florals to our Amazon Store.
Photoshoot Prep: Call Sheets - If you are working with models and/or crew, call sheets will be essential to get everyone the information that they need.
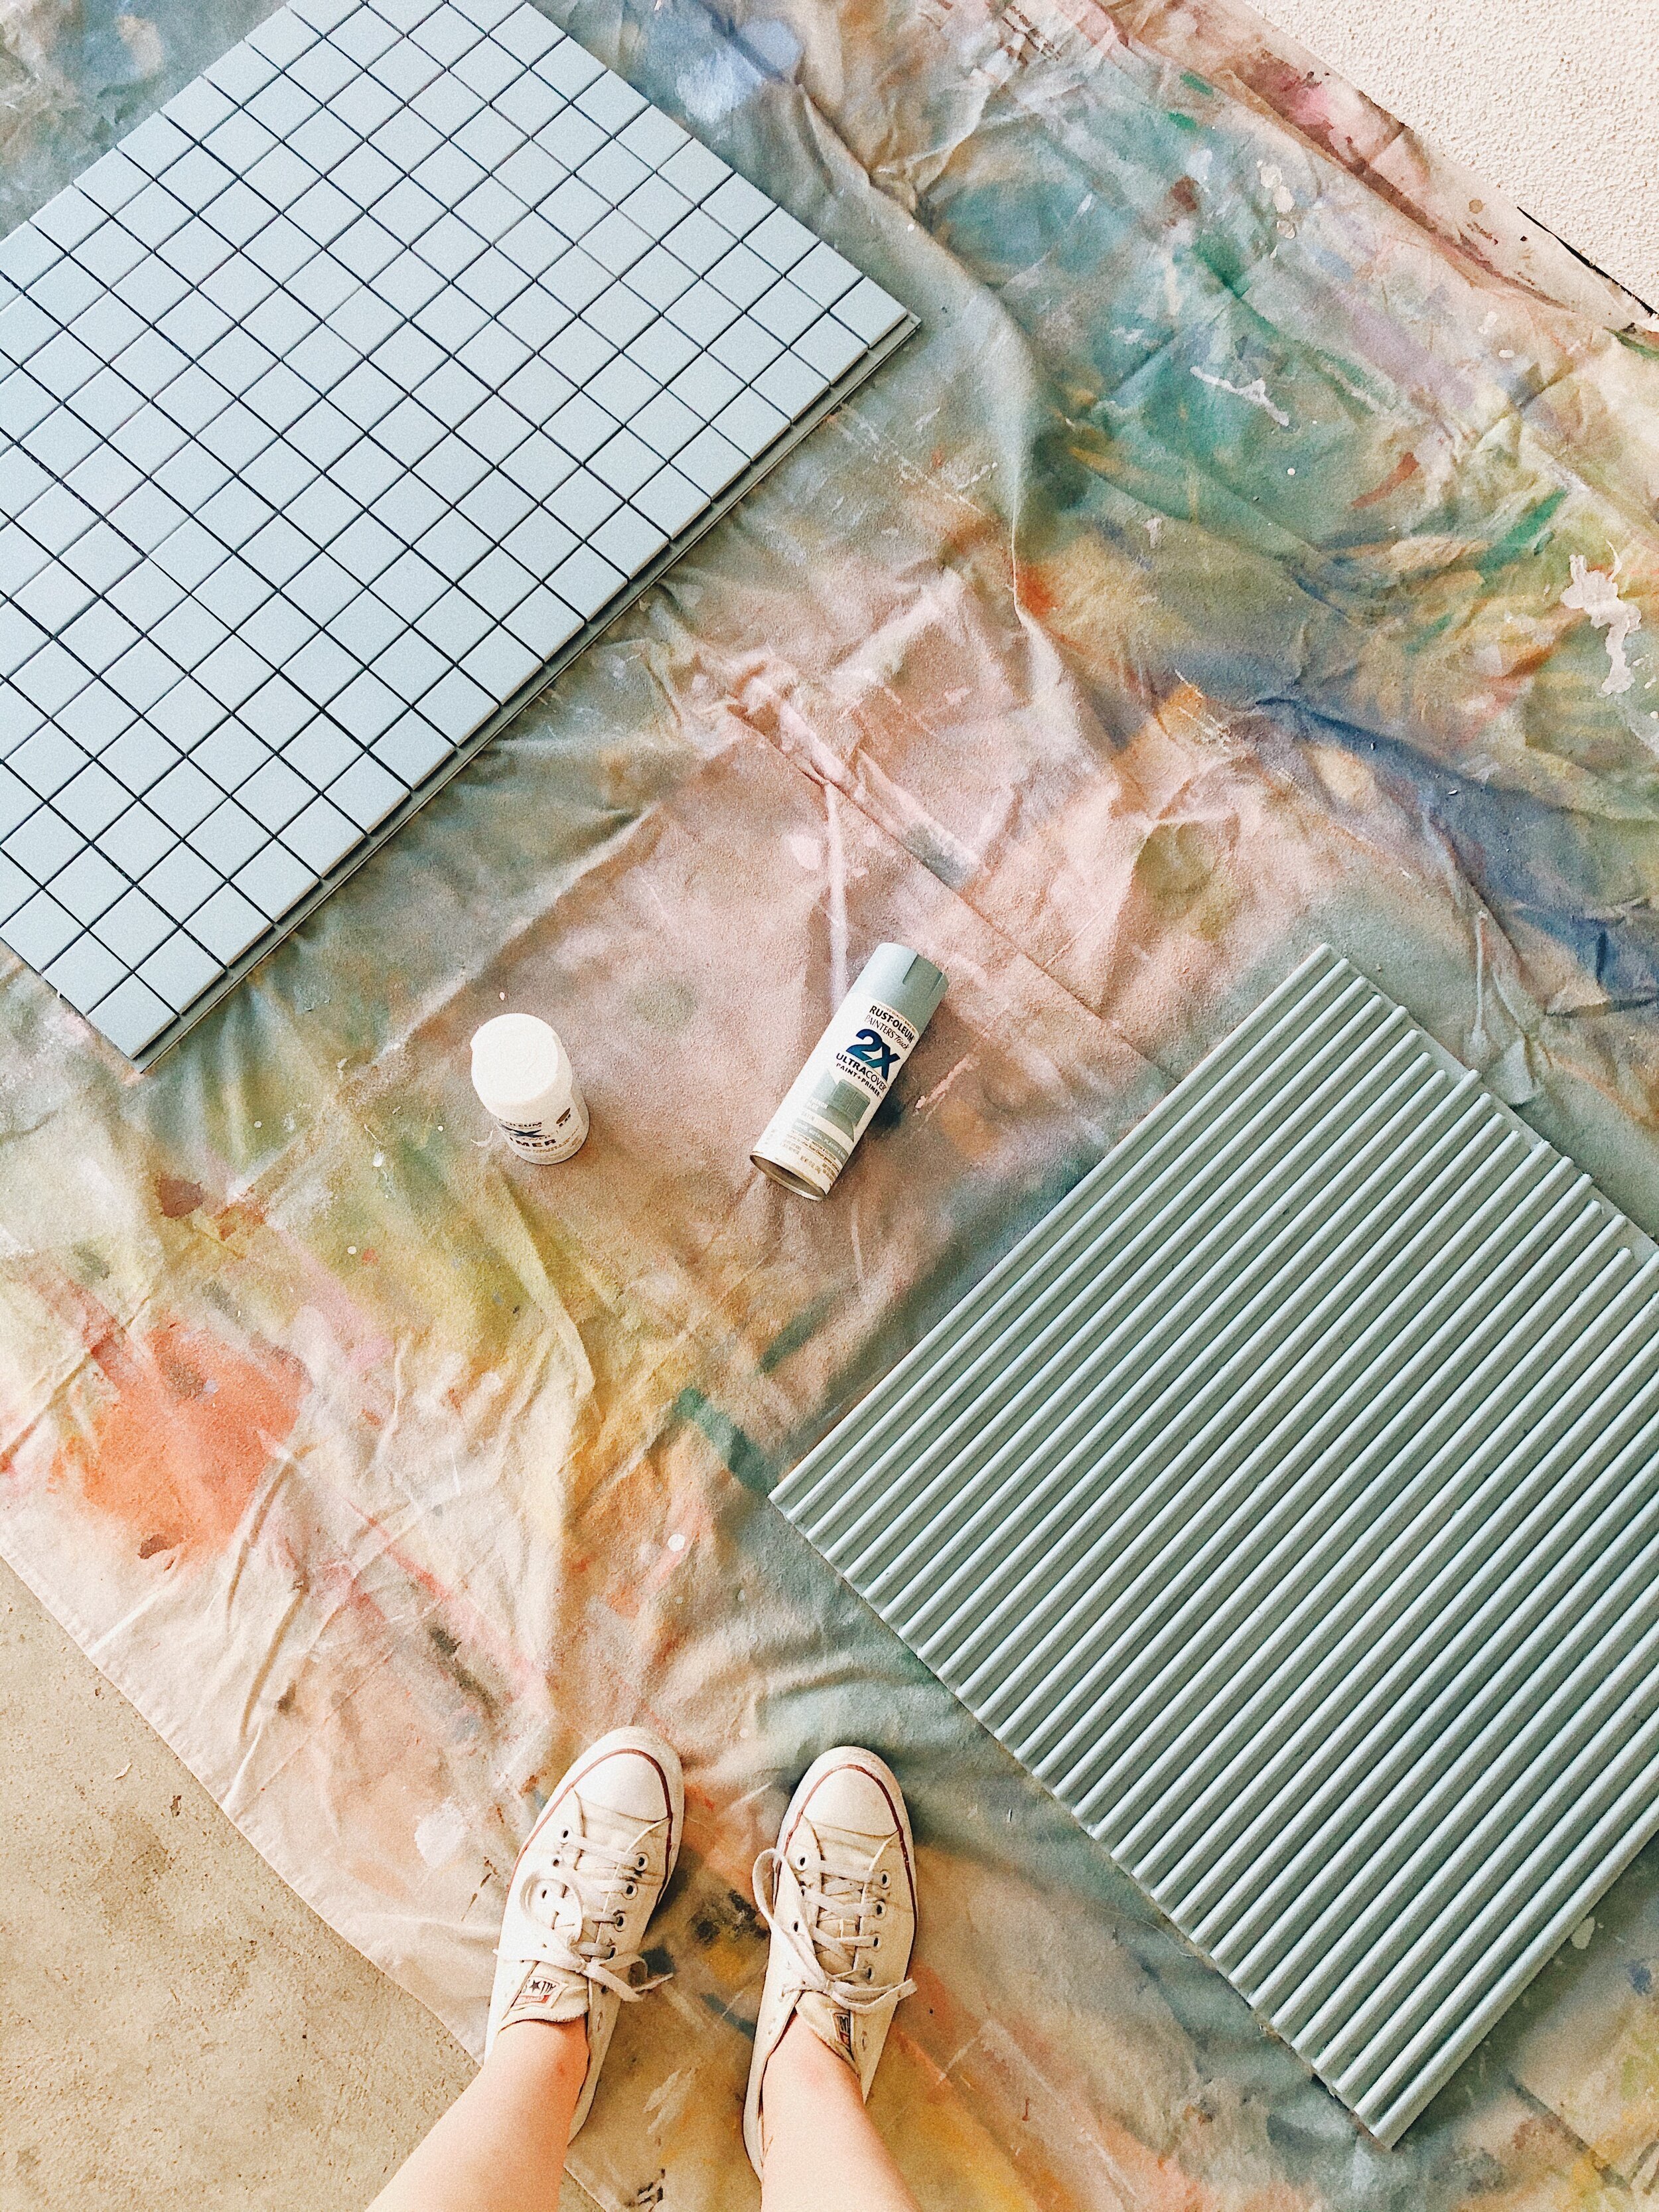
Our Backgrounds - If you see images that have a horizon line (see image 1), it most likely was made with 2x4 particle board that we painted with matte paint. If the background is completely smooth, (image 2) we used seamless paper from Savage Universal. We also often use fabric as a background or base (image 3).

Image 1 - this background was created using two pieces of 2x4 particle board painted in two different colors of matte paint.

Image 2 - this background is Savage Universal seamless paper.
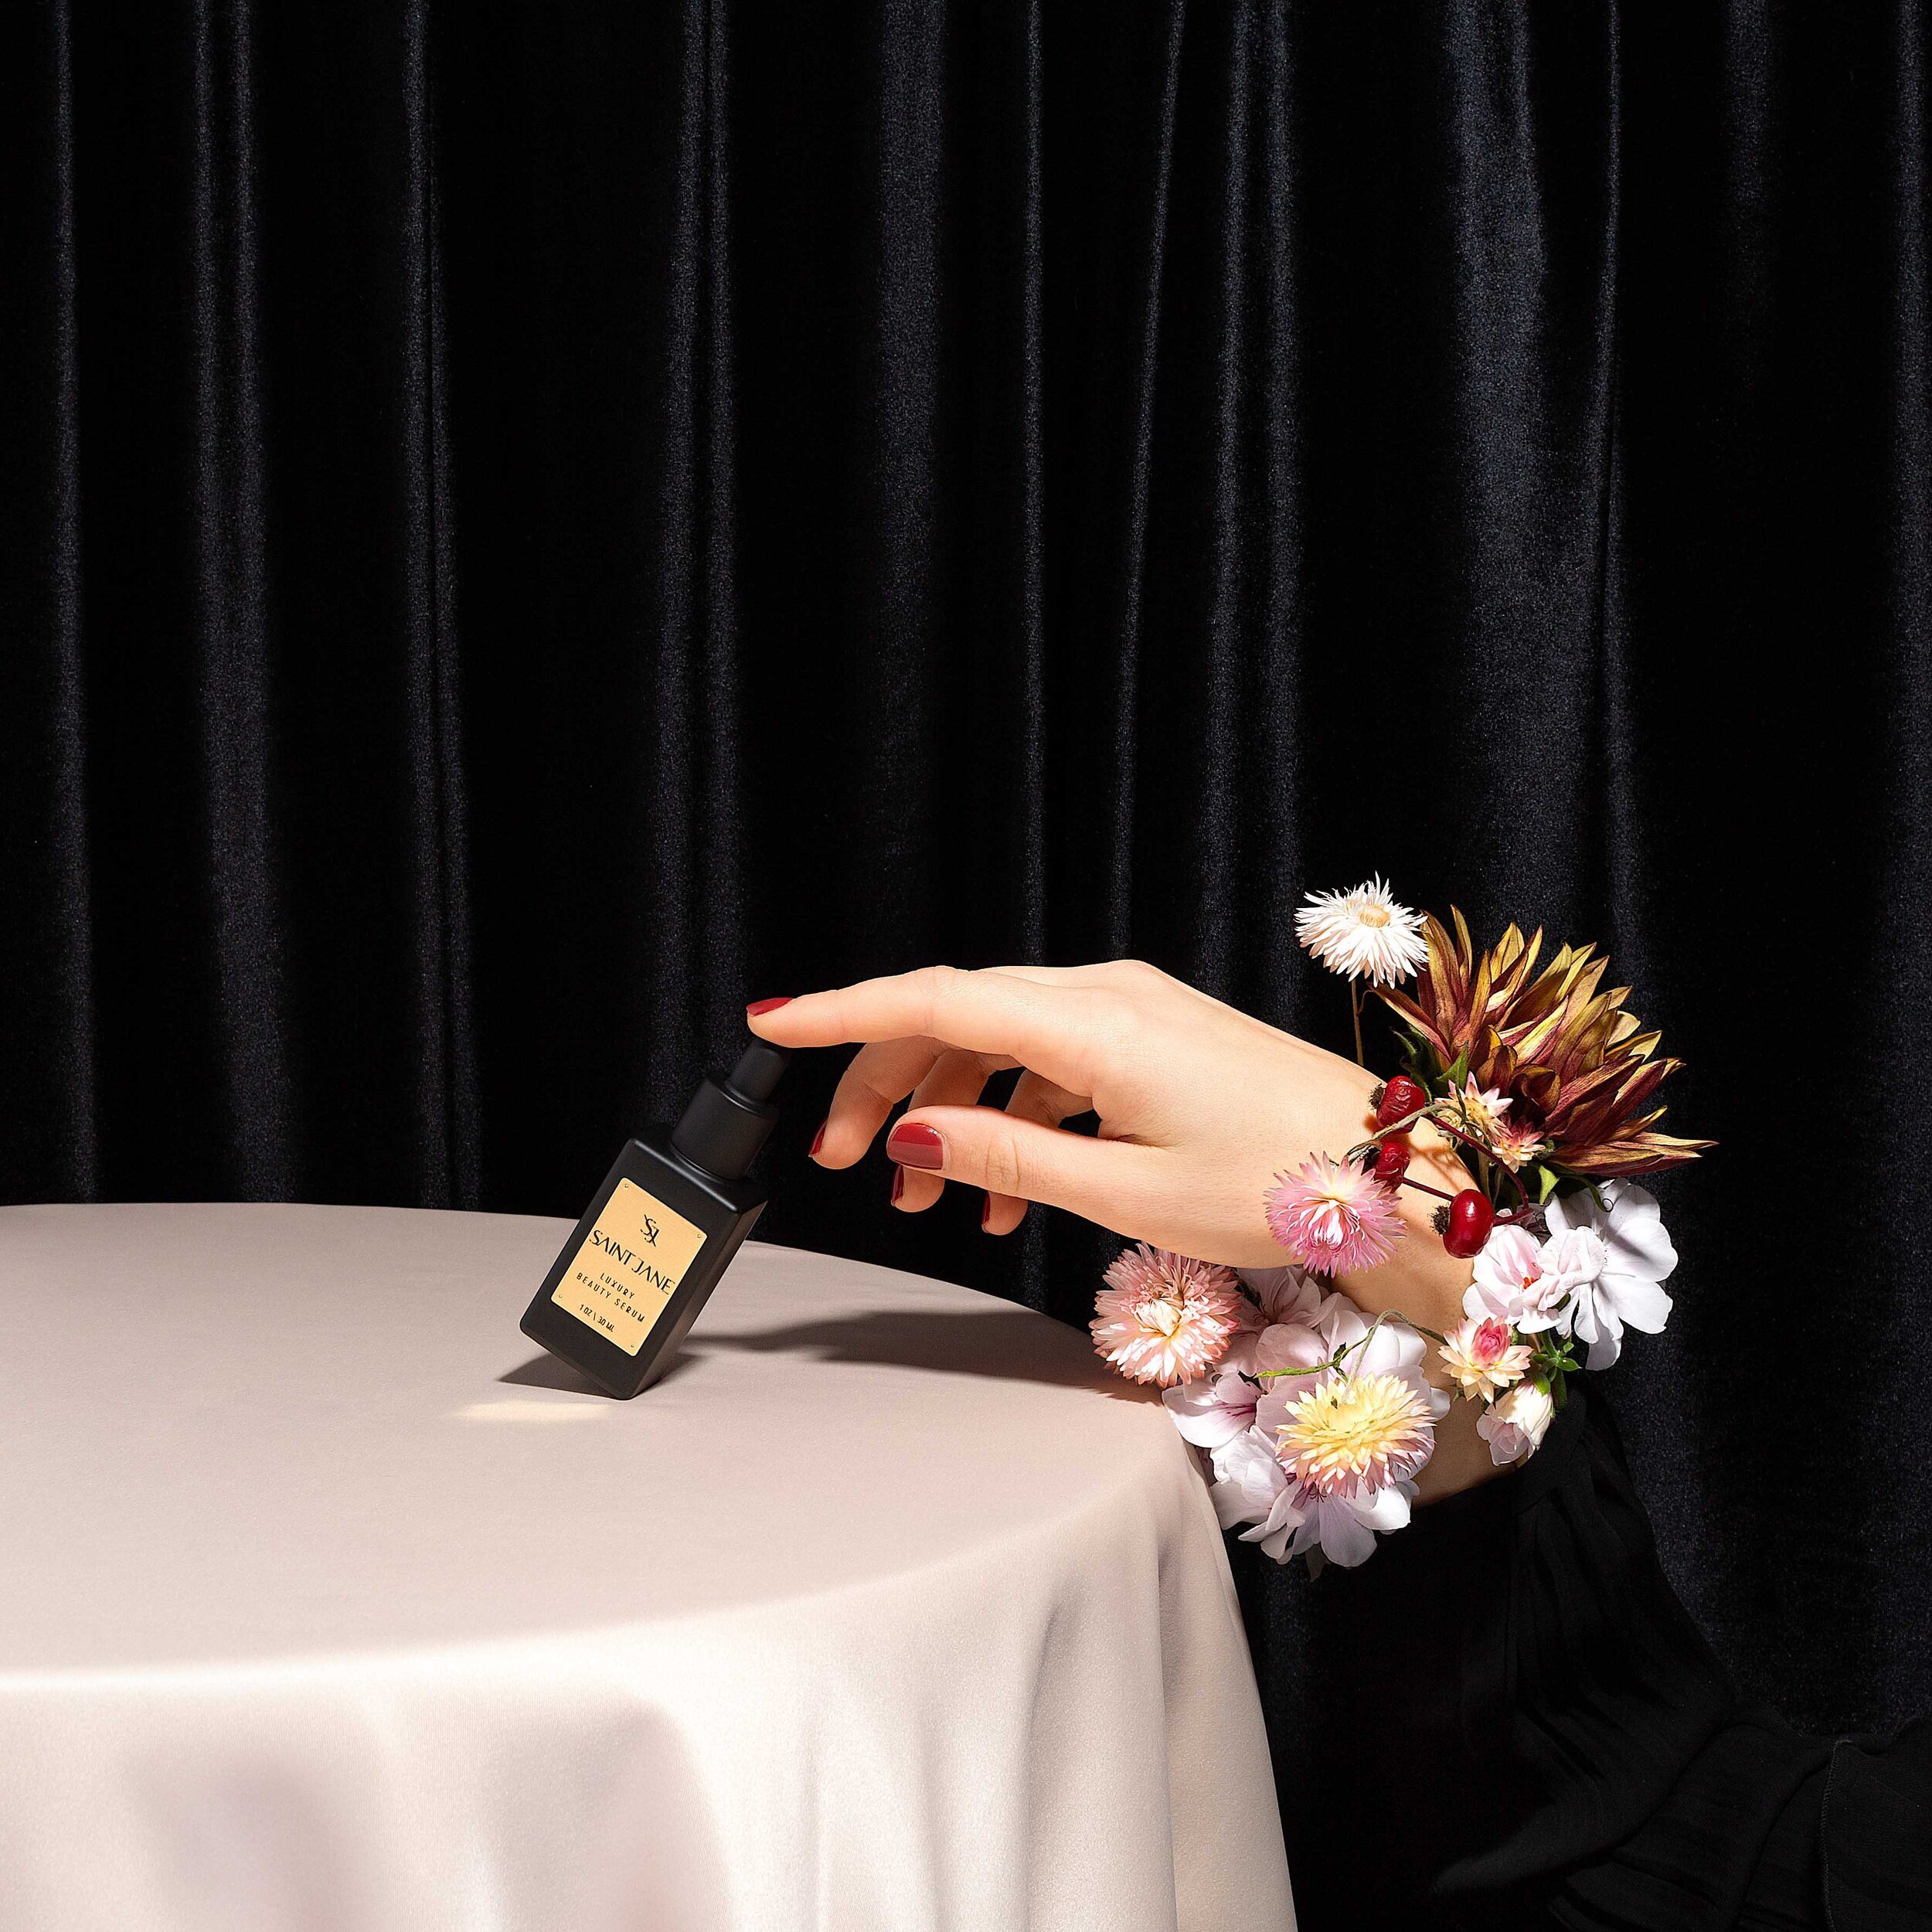
Image 3 - This background is black velvet from our local fabric store.
Creating Shapes - If we are creating shapes with paper (image 1), we will use our Cricut Explore Air2. For wooden shapes (image 2), we will cut pieces of particle board with a scroll saw and then sand the edges. For acrylic or plastic shapes (image 2), we place custom orders with Tap Plastics. You can also check out this post - Five Ways to use Paper in a Photoshoot. See more of our production tools here.

Image 1 - we created the pasta shapes with paper cut out by our Cricut and then glued them on with rubber cement.
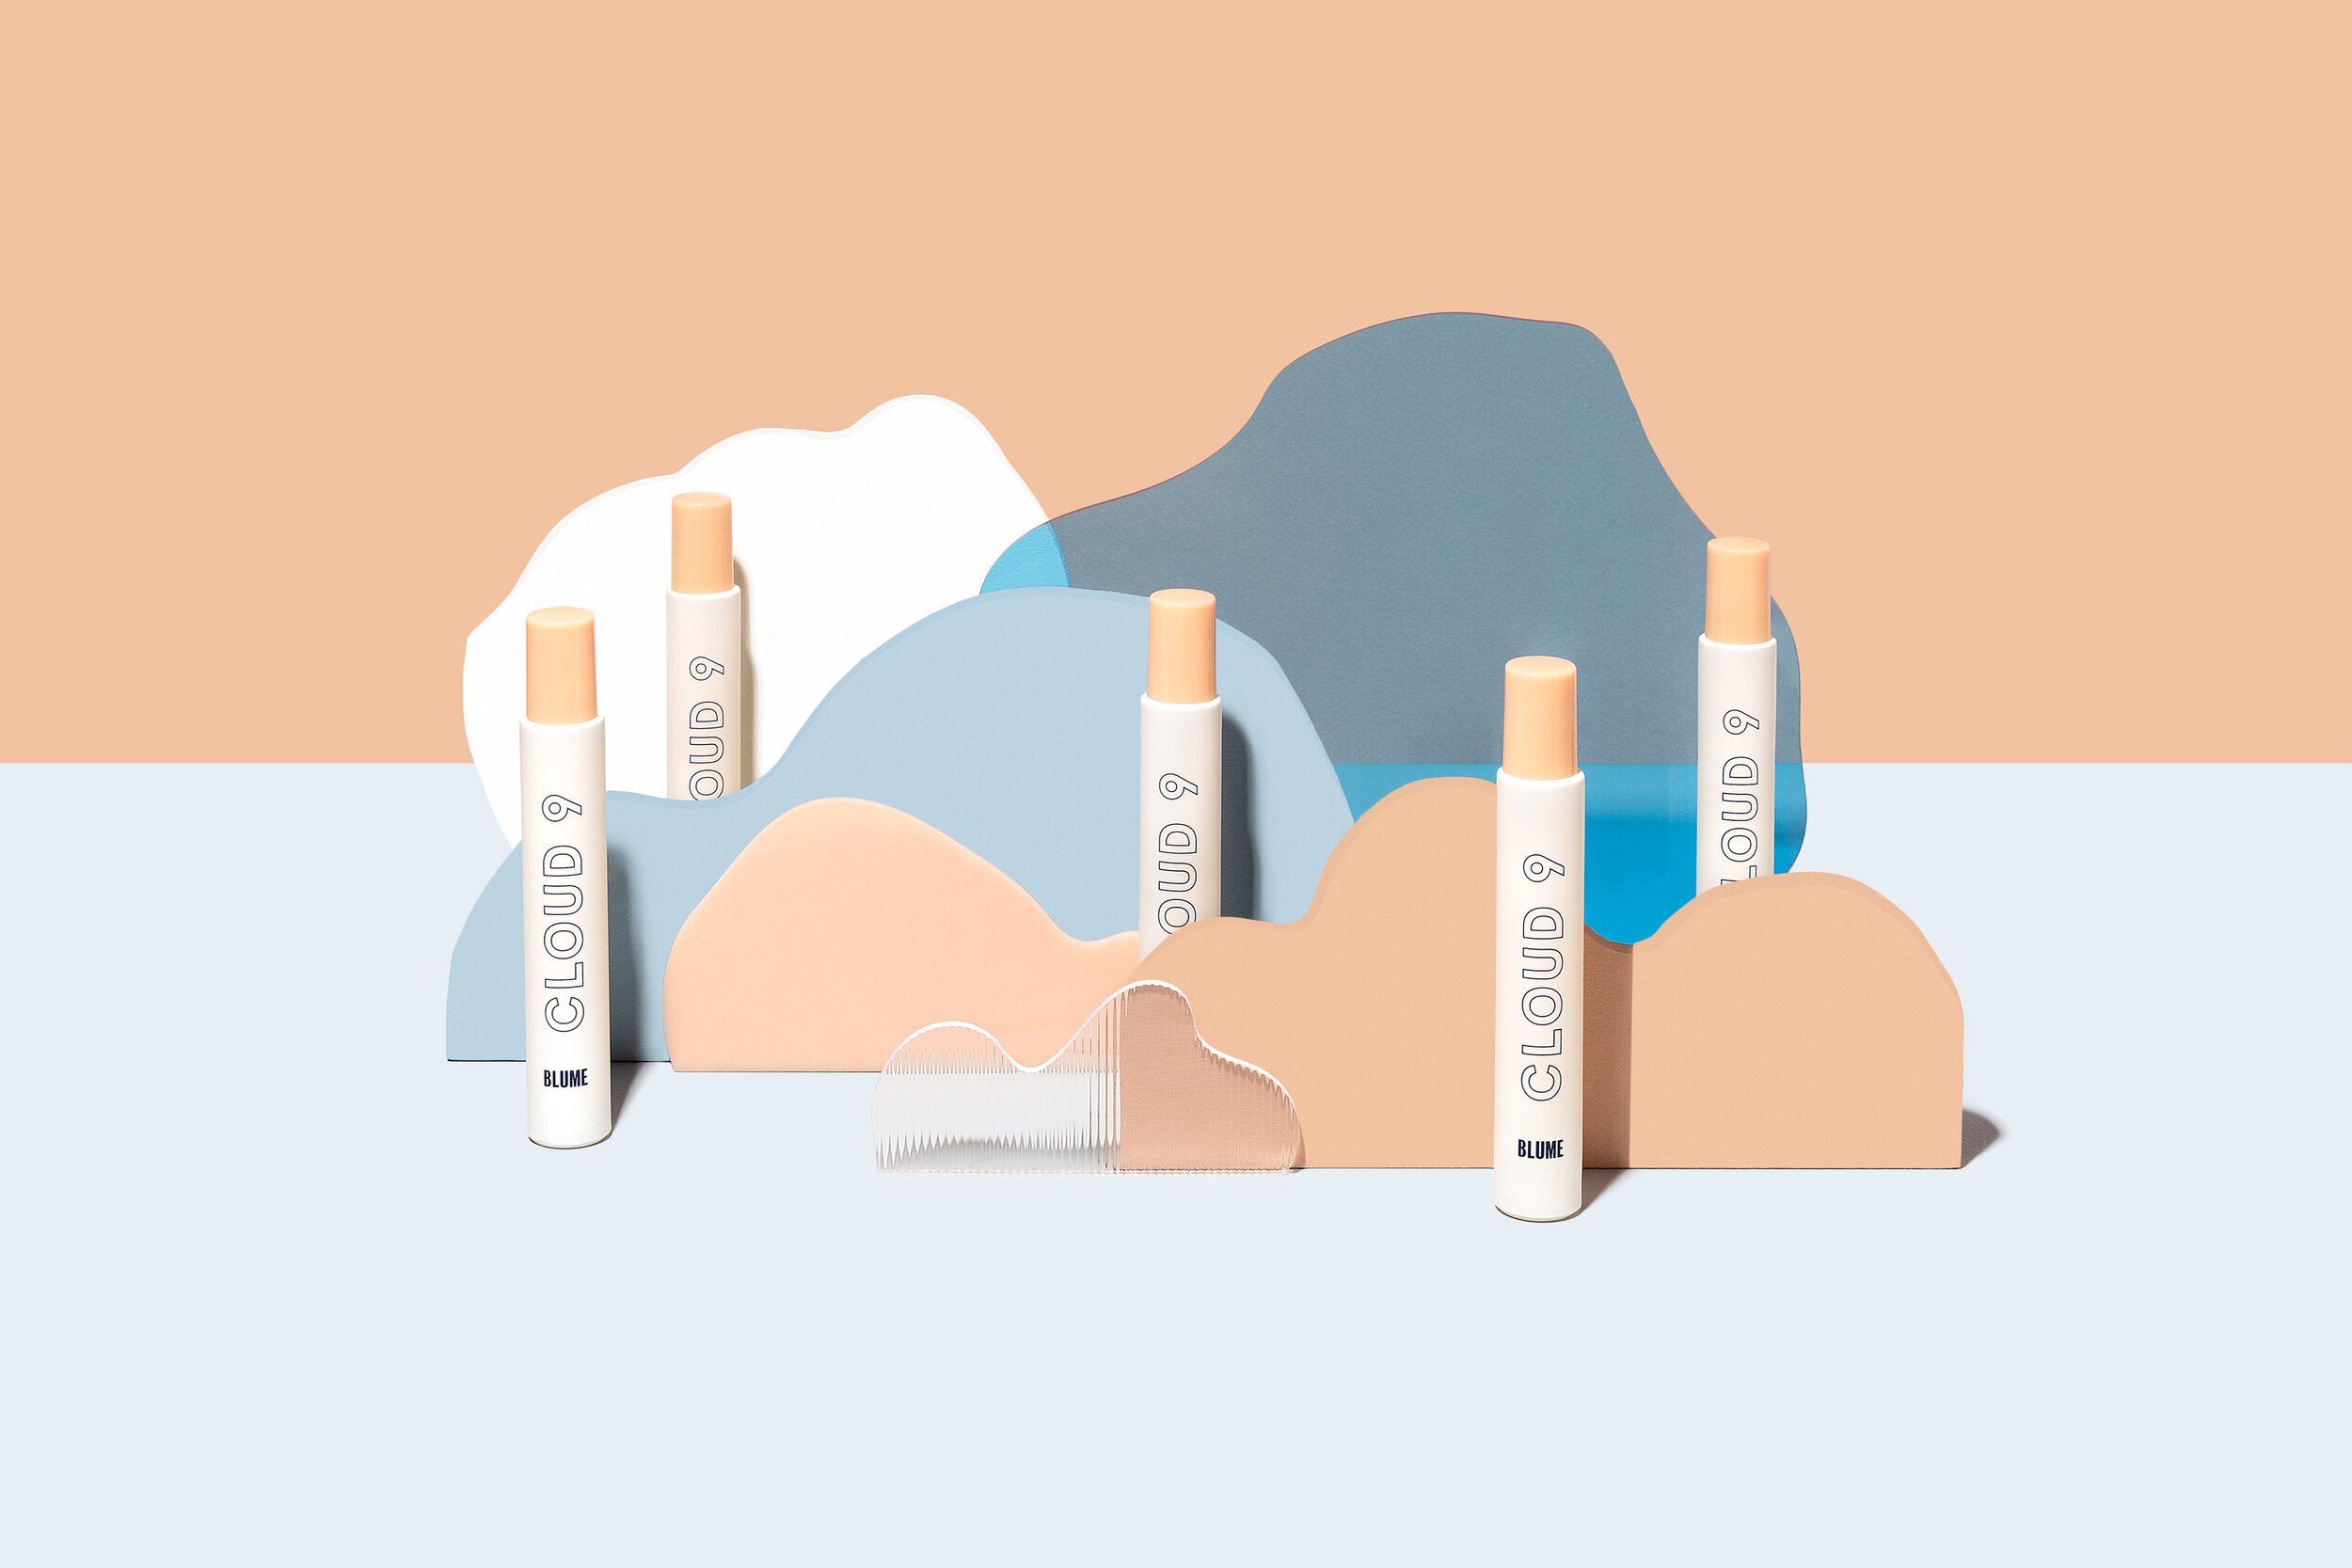
Image 2 - The solid shapes are made from wood, the transparent blue and clear shapes are made from acrylic.
Make Your Own Tile Photoshoot Backgrounds - Learn how to make your own tiled background. It’s much easier than you think!
If you want to see a full list of the exact items that we use in our shoots including equipment, tools, and props, you can check out our Amazon Store.
communicate when things change
Often, once you start executing a shoot, you will realize that certain changes need to be made. Sometimes a prop won’t come in time, a food item you need is out of season, or you simply come up with a better idea. Communicate all of these changes with the client to the best of your abilities ahead of time so they can stay informed. If things need to be changed during the shoot, make sure to communicate with the client why the changes were necessary when delivering the images.

shoot, edit, deliver
Once you have all of your props and sets ready to go, it’s time to shoot! We already have several posts touching on this, and honestly you want to learn shooting and editing from Arabela rather than me anyway. Here are a few helpful articles that are a great place to start.
Troubleshooting Tips for Product Photographers - As I mentioned earlier, there will be issues that come up when shooting. Here are our best tips for troubleshooting and problem solving during a shoot.
Why We Can’t Work Without Capture One - This is our #1 favorite tool for when we’re shooting. Read all about it here. We’re also coming out with a mini-course on how we use this in our process soon (stay tuned!)
Studio: Our Profoto Lights - The lights we use for all our images and to achieve those hard shadows we love so much.
Our Gear: Camera and Lenses - The first post in a series about our favorite gear.
Resource: Adobe Live - This is a great place to learn editing tips and tricks from photo pros.
How to Edit and Not Lost Your Mind (Or Break Your Back) - Arabela’s editing tips for how to take care of your mind and body while you’re editing for hours and hours and hours and…
Delivering Images - And last but not least, here is a blog post walking you through our process for delivering images to clients.
practice your process
I hope that this overview of our process has been helpful for you! I want to encourage you to use this as a starting point and then develop your own process that works for you. Planning a shoot will get easier the more you practice, so we recommend practicing your entire process from start to finish often. When you test shoot just for fun (read more here), make sure to plan throughly and treat it like a real client shoot. The more that you practice every aspect of your process, the more efficient and streamlined your entire process will become, and you’ll grow in confidence which will help you when pitching to future clients.
If you have more questions about our process, we would love to chat with you one on one! Read all about our coaching calls here.
Is it the weekend yet?
Elle